Showing posts with label crafts for kids. Show all posts

Monday, May 2, 2011

Easy Mothers Day Card / Easy Mothers Day Craft


Mother's Day will be here soon and you can quickly and easily make something for your mom.If you are a Dad, preschool teacher, or a School teacher looking for a simple craft that mom will love, try this out. My daughter made this greeting cards for me last year on Mother's Day in her School.

What you'll need:

    * Print out of poem or hand print poem
    * Water based paints - finger paints or tempera paints or acrylic paints.
    * Plate or something to hold the paint.
    * Brush or sponge to apply paint to hand.
    * Markers
    * Paper towels or some other way to do a quick cleanup

How to make it:

Here's the poem for you to copy or to print.

      Sometimes you get discouraged
      Because I am so small
      And always leave my fingerprints
      On furniture and walls

      But every day I'm growing --
      I'll be grown some day
      And all those tiny hand prints
      Will surely fade away

      So here's a little hand print
      Just so you can recall
      Exactly how my fingers looked
      When I was very small

      Put a date here
      Love, put name here

         written by T. Lambert, Jr.


What to do:


   1. Cover the table with newspaper where kids are going to paint..
   2. Have the children paint the palm of their hand with one color then press hand on the constuction paper .
   3. Keep it aside for drying.
   4. Clean the hand with paper towel or wash your hand.
   5. Print the poem or write the poem with marker inside the card.
   6. Personalize with the date and name (if it isn't already).
   7. Let it dry completely.
  8. Gift it to your Mother on Mother's Day.

You can have the child write " Happy Mothers Day"  and " I Love you Mom"on the front of the card and decorate it with pictures or colours using their creativity. Once mom reads the poem and sees the handprint she might just shed a few tears, the poem is quite touching and it is true how quickly children grow up.

Make sure that you put the date on the card and possibly the child's age at the time. That way when mom looks back through her cards she will know how long ago it was given to her and just how little that hand print was.

Happy Mothers Day !!!


Thursday, April 28, 2011

Cherry Blossom Craft for kids


What You Need :-

Construction Paper for the Background
Brown Paint, Crayons, or Markers for the branches
pink tissue paper
Glue ,white glue, and optionally, Elmer's school gel (blue), it squeezes out of the bottle so nicely

How To Make It :-

Protect work surfaces and children, you don't want this paint to get on anything.

Paint a tree with bare branches onto the construction paper with the brown paint. Or, you can draw one with brown crayons or markers.

Set aside to dry.

Tear tissue paper into little pieces and roll to make tiny balls.

Apply dots of glue alongside branches, and place balls in glue.

Gorgeous works of art Cherry blossoming tree is ready!

Thursday, March 24, 2011

Saint Patrick's Day Kid's Craft: Rainbow


Here is an easy rainbow craft for the preschoolers.How to decorate for saint Patrick's day.

Remember ROYGBIV

Red
Orange
Yellow
Green
Blue
Indigo
Violet

Materials Needed:-

White Card stock or white paper
Color pencils/markers/crayons
Scissors
Pencil
Beads/Gold Colored flowers
Glitter
Glue
Cotton

Instructions:-

Take a White card stock.Cut the White card stock into semi circle.
Then draw the arcs of the rainbow.
{This is where having a compass would have been handy!}
Then Paint or colour your rainbow. Let dry.
Decorate the rainbow with glitters or gold colored flowers or You can stamp a clover using the end of a pencil eraser or You can also add beads.
Glue "clouds"or cotton balls onto bottom of rainbow and enjoy!

Tuesday, February 22, 2011

Tissue Paper Flags


These tissue paper hangings can be used indoors and outdoors.The tissue paper flags look very prettier when there is a gentle breeze blowing.They are very easy,inexpensive  and quick to make.Kids enjoy doing this.

Materials Required:-

Tissue Papers
Ribbon/Yarn
Scissors
Glue

Method:-

Fold a piece of tissue paper into four and cut out different patterns.
Unfold and glue top edge over a ribbon or yarn to make a hanging banner.
 
Tip:- Use different colours of tissue papers.


This tissue paper flags  goes to Artsy-Craftsy February

Thursday, February 17, 2011

Tissue Paper Flowers


Tissue paper flowers are just so easy to make that they are a perfect decoration for any gift or event.


Materials Needed:-

Tissue papers
pipe cleaners
scissors


Instructions:-

1) For each flower you will need a stack of 8 sheets of tissue paper. You can use different colors.
2) Take your stack and fold it accordion style, into 1 inch folds. You can make different sized flowers by changing the size of the tissue paper squares and the amount of layers of paper you start with.

Accordion Style Folding

3) Twist a pipe cleaner around the center to keep paper together..
4) Gently pull apart the paper on each flower layer by layer, and fluff the paper upwards to create the flower’s shape.
5) You can try rounding out the edges or cutting diagonally to create pointy edges with your scissors before you form the flowers to create different petal shapes.
Attach your finished flowers onto your gift box or arrange them on tables or in vases.

This tissue paper flowers goes to Artsy-Craftsy February


Tuesday, February 15, 2011

Cereal Necklace


This Edible Cereal Necklace  can be a Great 100th day of school activity..It can also be a fun preschool party activity.This also makes a great activity for kids’ birthday parties.This cereal necklace activity is great to keep the kids engaged and entertained indoors when its cold and rainy days.

This is a great fun craft for kids to do.They can create a beautiful piece of jewelry that they can wear. When they want to have a little snack they can eat the cereals/ Cheerios off the necklace.

My daughter made this for her 100 th day of school activity.


What you need:

Fruit loops/ cheerios / Apple Jacks/or any other cereals with a hole in it like cheerios
Yarn or strings

Instructions:


Divide cereals in bowls. If multiple children are making necklaces, give every child their own dish of assorted ingredients to minimize squabbling.
Take the piece of yarn or string and cut it so that it is about sixteen inches long.
Take one of the pieces of cereals and fit it into the end of the yarn.
Then tie that one piece of cereal onto the end of the yarn . This is the end of the necklace and the one piece of cereal that is tied to the yarn will prevent all the other pieces of cereal from slipping off the yarn.
Let the kids put the cereal onto the string one piece at a time.
Once the  yarn is full of cereals you can tie the two ends of the necklace together and wear it.

Make sure the cereal and yarn or string you use is clean. You may also have your child wash their hands before they make the cereal or Cheerio necklace.

Thursday, February 10, 2011

Handmade Valentine's Day Card


         Card making is easy.  Make you own greeting cards and sign them by rubber stamping "Handcrafted by (YOUR NAME)" on the back of every of your handmade cards.
         Card making as a hobby is not expensive since you should have most of the supplies for making all kind of greeting cards in your home. For a basic homemade card, all you need is paper, cutter, glue and some color pencils.
          But though inexpensive, making your own greeting cards has many benefits.Making greeting cards is a great way to relax, be creative and connect with others. Receiving a handmade greeting card is so special, isn't it? So do start making greeting cards today!
          Make this Valentines Card and express your love for those you hold close to your heart. Surely a card made with your own hands is especially precious and will be treasured by the one you love. My daughter made this greeting card for her teacher.


Materials Needed:-

White cardstock
Foam sheets
Sparkles
scissors
glue stick
Ribbon
Happy Valentines Day clear sticker
All Purpose glue
Flowers Stickers
Hole Punch
Markers

Instructions:-

Cut a white  piece of card stock and fold it in half to make a plain card.
Cut heart from the foam sheets and  attach it to the card with glue.
Write "Happy Valentine's Day with markers or stick Happy Valentines day clear sticker.
Add embellishments as desired. These can include buttons, lace, ribbons, trim ,stickers ,sparkles and other decorations.
With the hole punch,punch the foam sheet.After punching small round pieces are there stick them together to make a flower.
This is a perfect card for to make and gift. 


Monday, February 7, 2011

Message Rocks ~ Rock Painting


Rocks can carry messages!I love rocks. My daughter also loves rocks very much.Rocks that are hand painted you can keep for yourself and place in strategic places to inspire you.That Painted Rocks with messages can be given to loved ones, friends, people you care for.

Amaze your Friends with special rocks painted just for them ! My Little Girl made this to give as a gift for her classmates on Valentines Day.She had fun writing her classmates names on rocks and giving them away.This is a fun project for kids, teens, and adults!


Materials  Needed :-

  • Smooth clean stones
  • Acrylic paint
  • Paint Brushes
  • Mod Podge (optional)
  • Water
  • Plastic Cup for Water

Instructions:-

1. Wash your rock to remove dirt. Dry it with a towel and then let it air-dry for 15 minutes.

2. Paint the rock with your desired colour. Let it dry  completely.Once that is dry, paint the rock with another layer. It gives a nice rich color that way.

4. Then turn the rock and paint it and keep it for drying.

5. Once your paint is dry you may wish to put a coat of Mod Podge on as a sealer.

6. So just go ahead and brush it on nice and thick...don't worry, it dries clear! Let them dry completely.

 7. Once everything is dry,You can start writing the message  you might like on your rocks...the sky is the limit just use your imagination! Let it dry completely.

You can write messages such as:
  • Rock on
  • You rock
  • Love
  • Hope
  • Smile
  • Laugh
  • Hugs
  • Cheers
  • Thanks
  • You can also write your Friends Names


Tuesday, February 1, 2011

Butterfly Card / Valentines Day Card


Two classic Valentine's Day gifts — Butterfly Card and candy — combine to make one sweet treat.These can be perfect Valentine handmade cards for your kids to take to school .


Materials:-


        * Card stock (optional)
        * Pencil / Markers
        * Scissors
        * Construction paper
        * Colored card stock
        * candy stick
        * Pipe cleaners
        * Stickers
        * glitters

Instructions:-
     
I Downloaded  the Butterfly template from here.

Print the template onto Colored card stock and Cut out.

Cut the slits for the candy-stick.

Open the wings and weave the candy stick down into one slit and up through the other.

To make the antennae, wind the pipe cleaner tightly around one end of the candy stick so that two equal lengths extend upward and then curl the ends.

Finally, decorate your butterfly with one decorations (cut out shapes of paper, stickers, glitter, etc.) and write your message on the wings or back.


Note:- Instead of candy stick you can also place a color pencils or pencils or markers as a gift for kids.

 Source:- Familyfun.go.com

Sunday, January 30, 2011

Origami Sailboat


Origami is the ancient art of folding paper. Amazing things can be made without cutting or gluing in origami.My daughter enjoyed making these sailboats.

Materials Needed:-

Square colored paper

Instructions:-

1. Get a piece of square paper color side up in a diamond shape.
2. Fold the paper in half diagonally and crease.
3. Fold left and right corners up to the top corner and crease, which should create a small diamond shape.
4. Pull the left and right corners back down to return to the triangle shape.
5. Fold the first layer of paper from the top corner down to the bottom.
6. Fold the left and the right corners back to the top corner along the same fold.
7. Flip paper over to the other side.
8. Pull the single layer of paper from the top corner.
9. Flip paper over.
10. Fold bottom corner up to middle and flatten.
Now you have a sailboat!

Source :- Activitytv.tv

Tuesday, January 25, 2011

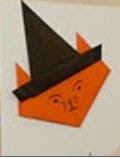
Origami Cat in a Hat


Cat

1) Take a square 6" x 6" piece of paper.
2) Fold and crease it along the diagonal.
3) The fold the left corner on top of the right, and crease the fold.
4) Now unfold the triangle so it lays flat again.  Then fold each corner upwards to make the ears.
5) Now fold the top corner over towards you.
6) Now flip the cat over.
7) Now draw eyes, a nose and whiskers on the front with a marker or pen.


Hat

1) First take a square paper.
2) Now fold your paper in half, below left.  The fold the top corners towards the middle as shown in the above picture. 
3) Crease the folds so that the piece lays almost flat.  The take the bottom edge of the paper and fold it upwards.
4) Flip the piece over and fold the other edge upwards. Origami hat is ready!
5) Stick it with glue on origami cat .
Cat in a Hat is ready!

Monday, January 3, 2011

Apple Collage


This is Quick to make and great fun for younger children. This apple collage is a great autumn craft. Your child will enjoy this easy apple collage craft.My daughter made this when she was in kindergarten.

You will need:


Scraps of red paper (tissue,construction paper, junk mail, wrapping, glazed paper etc)
Small scrap of green paper or green crayon /marker
Glue
Paper plate
Black marker/crayon
Pencil
White paper

Method:-

First take a white paper and draw apple in a plate.
Then take a red paper.Tear it into small pieces.
Paste them into the outline of the apple.
Cut out leaf and a stalk from the green paper and glue it OR color the leaf and the stem with green crayon or marker and the plate with appropriate colors.

Monday, December 20, 2010

Fingerprint Art


Materials Needed:-

* Paper
* Ink pad / Paints
* Markers


Instructions:-


 # Roll your thumb over the ink pad or paint .
# Make a print by firmly pressing the inked thumb against the paper. Use different fingers to make prints of various sizes.
# Wash your hands and allow the prints to dry for a few minutes. Then draw funny faces or animals and other details on the prints.

Friday, December 17, 2010

Milk Carton Ginger Bread House


If you are looking for an easy gingerbread house to make with kids,in the classroom or at home then a milk carton gingerbread house is perfect for you.Milk carton gingerbread houses are easy for kids to make and fun to put together.This  Christmas craft allows kids to be hands on and involved from the very first step- no waiting around for mom or dad to complete the complicated prep.As your child's imagination is stimulated, his motor skills will receive a boost!Yesterday my daughter's class was having Christmas Party. There they made and decorated this no-bake Ginger bread house.

Materials Needed:-

Milk Carton
Graham crackers
Frosting / Icing
assorted candies
Small candies
M&M's
Gum drops
Red Hots
Peppermints
Candy canes
Pretzel Sticks
Mini Marshallows
Cherrios
Paper Plate
plastic knife
shredded coconut / coconut powder
News paper
Cookies
Sprinkles


How to build:-

# A few days before the activity, We rinse out the milk cartons and let them dry.Otherwise, a sour-milk will come out of milk carton.
# We used milk carton as the base of the house.
# First gather all needed materials and get organized before beginning to assemble milk carton gingerbread houses with your kids.
# Its best to have all of your candies ,pretzel sticks,cookies and gingerbread house decorations in individual
bowls or in a big paper plate separated each thing.
#If you are using homemade icing, prepare it ahead of time. Always cover homemade icing as it will dry out
quickly.
# Cover the tables where kids are going to make ginger bread houses with newspapers.
# Place a milk carton on a paper plate.
# Smear Frosting onto the side of your milk carton, covering all 6 sides.
# Stick on the graham crackers across the angled tops of the cartons to make the roof and 4 sides to make the walls and press firmly to attach.
# Using the frosting as a glue have kids decorate the gingerbread house with candies.
# Use green candy as shrubbery for the front of your house.
# You should have variety of candies on hand to use to decorate gingerbread houses. Look for unique candies.
# Sprinkle coconut powder / Shredded coconut all around the house as snow.
Be creative !Use your imaginations.If desired create detailed designs.

This is reaching Artsy Craftsy's  Edible Crafts  event and  Christmas Craft Event 2010 

Tuesday, December 14, 2010

Light Bulb Reindeer


Making a light bulb reindeer can be a project for the whole family to enjoy.This project can be great winter art project / Holiday Project for kids in the classroom.With a few simple craft supplies and some hot glue, you can make a reindeer.My daughter made this one with little bit help of me.
                  You might need to use tools that require adult supervision, such as hot glue gun and scissors. If so, these can be replaced by textile glue and safety scissors. Make sure you ask your parents or teachers help.


* Age Guideline: 6 Years and Up
* Time Required: 40 minutes (Does not include drying time)

Materials Needed:

* Light Bulb (You can use Burnt on Light bulb also)
* Newspaper
* Paint (Acrylic Paint brown)
* Ribbon
* 3/4-Inch Red Pom-Pom
* Craft Glue or Hot Glue Gun and Glue Sticks
* Paint Brush
* Scissors
* Googly Eyes or black markers (to draw your own on)
* 2 glitter gold Pipecleaners


Instructions:

1. Cover the table with newspaper where kids are going to paint.

2. Place paint brushes, paint, Paper plate with brown acrylic paint.

3. Paint the light bulb with brown paint. Let the paint dry completely.

4. Paint lightbulb with a second coat and let dry completely for 2-3 hours.

5. Put a dots of hot glue and glue the googly eyes. Glue on the red, pom-pom nose.

6. Bend each pipecleaner in half, then bend and twist them to form two antlers as pictured, then hot glue the

antlers at the top.

7. Form a loop with a piece of ribbon, about 10- to 12-inches long and glue it on the top, back edge of your

reindeer head. This will be the hanger for your ornament.

Tip:-

1) You can also add jingle bells.Jingle bells are available at discount department stores and craft supply stores.
2) Save burnt out lightbulbs for these types of projects.


This goes to Christmas Craft Event 2010 

Thursday, December 9, 2010

Fingerprint Flowers


Kids love to get messy, and allowing them to do so actually improves their motor skills and they will also have lot of fun.Allow kids to express their creativity with a finger-painting activity.My daughter made this beautiful flowers with her fingerprints.This idea can be used to make a beautiful greeting card also.


Materials needed:

construction paper ( We used white)
paints or ink pads
Newspapers to lay across the table
markers or crayons
Paper Plate or Plastic Palette
Small cup
Water
Tissue paper


How to make your Fingerprint Flowers:

1) Cover the table with newspaper where kids are going to paint.
2) Take a tissue paper and small cup with water (for rinsing the hand).
3) The first thing is to take the light colored construction paper and a paper plate with a few colours on it.
4) Let them dab their fingers into the paint and then put fingerprints on the paper. We can also use washable ink pads to do this, instead of paints.
5) They can make fingerprint flowers by arranging four or five or six prints in a petal formation.
6) After the paint dried we can add some final touches with markers.With the markers children can draw some stems for flowers.

Your cute fingerprint flowers are ready.

Thursday, December 2, 2010

Rock Burger ~ Rock Painting

You can paint rocks to look like lots of different kinds of food. My daughter with little help of me made burger for her picnic table.My daughter enjoyed a lot painting the rock.This project is a good project for all age levels and the kids can feel really good about and use their imaginations to play with .We took this idea from the book "Painting on rocks for kids by Lin Wellford "


Materials Needed:-

Rock
Pencil
Palette or Paper Plate
Paint of your Choice
Paintbrushes
Water
Small Cup
White colored pencil
White Dimensional Paint (Optional)


How to Paint:-

1) Find a burger shaped rock. They can be big or small as you wish,but rock fits into your hand is perfect.Scrub the rock clean and let it dry.

2) Draw the bun lines:- Draw a line all around the rock, a little bit over the center.Make another line below the first line,leaving enough space for burger patty and toppings.

3) Paint the Pattie or meat :- Use your large or medium brush and brown paint to paint the meat or pattie,keeping the top and bottom edges as smooth and level as you can. Let the paint dry.

4) Mix Paint for the bun:- Use your brush to mix two drops of yellow ,one drop of white and one half drops of orange.Put a small brown on your palette and pick up a little on the tip of your brush. Add it to mix. Add touches of brown and white until the mixture is the colour of a bun.

5) Paint the bun :- Use your brush to cover the entire top half of the bun with the bun colour. when you are finished dont rinse your brush ,but use to mix the next colour.

6) Paint a tan ring and the bottom tan:- The bun should be lighter just above the meat. Mix a drop of two of white the paint left on your brush ot make a tan.Paint a narrow ring just above the meat.Use a dry brush to soften the edge where the two colors meet.paint hte bottom bun this tan colour too.

7)Add the fillings:-Use a white pencil to sketch half round tomato slice, cheese triangles ,ruffled edge of lettuce.

8) Paint a base coat for filling:- To help the fillings stand out, use brush with yellow to paint all the shapes you
just sketched.Leave a narrow ring of brown paint showing along the tops of the fillings.Make sure edge of the
lettuce looks wavy.

9)Paint the cheese , tomato and lettuce :- Use red paint to paint tomato slices and yellow paint to paint cheese
triangles.Paint lettuce leaves with pale green colour.( yellow + white + green).

10)Dot the top of the bun:- Use smallest brush and brown paint to paint small dark dots over the top of the
bun.Don't put any around sides.

11) Add sesame seeds:- You can paint the seeds with white paint or with white dimensional paint .Touch the tip of the bottle just off the center of each brown spot then lift up sideways.A rim of brown should show on one side.When; all seeds are painted let it dry for an hour.

Wednesday, November 24, 2010

Thankful Turkey Craft


This easy Thankful turkey craft is a great for school children .This cute construction paper turkey lists what your child is thankful for. It makes a very nice Thanksgiving decoration.My Daughter made this for thanksgiving in her class.

Materials needed:

    * Construction papers
    * Turkey template
    * Scissors
    * Glue stick
    * Markers
   

How to make your Paper Turkey Craft:

    * Cut a brown construction paper circle or oval (about 8 inches across) for the turkey's body.

    * Print the template of  head ,wattle, legs and cut out the pieces. Trace the template pieces onto construction paper and cut the pieces out.

    * Glue the head to the body.Glue a tiny yellow or orange triangle for the beak and little red blob for the wattle.Either draw eyes with black marker or glue on googly eyes.

    * Glue the legs to the body.

    * For feathers cut six long ovals -use colourful papers if you like.

    * On each oval/ feather , write: "I am thankful for ______".Have the child write what they are thankful for.

    * Glue the feathers to the back of the turkey's body .

    * Don't forget to write the child's name on the turkey.


What are you thankful for?

Here are a few things that my daughter is  thankful for:

1. My Family
2. My School
3. My friends
4. Our Earth
5. My Home
6. My Food

Some more Examples are:-

1. God
2. Grandma
3. Grandpa
4. Uncle
5. Aunt
6. Water
7. Air
8. Books
9. Pets
10.Trees

Monday, November 22, 2010

Thanksgiving Paper Plate Turkey


This Thanksgiving paper plate turkey craft uses a small paper plate, some construction paper and paint.This turkey is simple enough for even young children .It can also be a good class room activity for children for Thanksgiving. Turn it into a craft for the whole family and enjoy your Thanksgiving!

Materials need:

    * 1 small paper plate
    * 3 colour construction papers ( I used yellow ,green, orange )
    * 2 Googly eyes
    * Scissors
    * Glue
    * Tape
    * Brown paint ( I used acrylic paint )
    * Paint brush

How to make Paper Plate Turkey Craft:

    * Paint the small paper plate brown paint and set aside to dry.
    * Cut feather shapes out of the construction papers. You will need 3 feathers of each color.
    * Cut a small triangle out of orange or yellow construction paper for a beak.
    * Cut a small peanut shape out of red construction paper for a waddle.
    * Cut two feet out of orange or yellow  construction paper.
    * Tape or glue the feathers onto the back of the paper plate.
    * Glue the beak,eyes, waddle, and feet to the front of the paper plate.

Your beautiful Thanksgiving Turkey is ready.
 
Source :- Allkidsnetwork.com

Friday, November 19, 2010

Felt Mask


This is super simple to do and you probably have most of the supplies in your craft closet. My girl had a fun  making it.


Materials Needed:-

* Felt
* Scissors
* Thin  Elastic
* Needle and Thread
* Hole Punch
* Decorating items (Optional)


 How to make:- 

1) First draw out a pattern or print pattern whatever you want and test for a size on your child.
2) Then draw the pattern on the felt . Then cut out the shape.
3) Now cut the eye holes out.
4) Sew elastic in place on one side, adjust length to suit the desired head size, and sew the other side in a similar manner.
Or Simply punch holes on each side with hole punch .Adjust length of elastic to suit the desired head size and then from both the holes pass the elastic and tie the knot tightly.
5) If you want you can also decorate it with beads ,glitter or stickers etc.
Your easy felt mask is ready.
Related Posts Plugin for WordPress, Blogger...